Showing posts with label Skype Craft. Show all posts

Monday, 27 July 2020

Skype Craft - Ken's Houses


Hello! It seems like a while since I have posted on here. I have been doing some online classes during the lockdown period but either haven't got round to taking photos to share or haven't finished them!!! Still crafting just not finding the motivation to blog.

However a week or so ago I had another Skype Craft session with Alison Bomber and Brenda Brown - actually it was across 2 sessions as we chatted so much we didn't finish the first time (and we had to allow Alison's crackle to crackle!)
Brenda's lovely husband Ken has been busy and cut us all some wooden houses - so we all worked on the same substrate.


I painted my houses with Summer Sky Fresco paint and then randomly coloured on Tim Holtz printed tissue paper (on the back). Having added this to the substrate I added some book page scraps, some drips and some leftover stamped card. I also added some extra paint highlights to help with the colour composition.


I stamped a quote (an old Tim Holtz stamp set) on some painted card and found some leaf and butterfly embellishments that I painted and stamped on.

The sides - that you cant see too well are also stamped.


Pleased with these - so much so I have them in my living room - to remind me to challenge myself occasionally!

My lovely friends have both excelled themselves with their designs.....you can find all the details on their blogs.


Nikki xxx

Friday, 15 May 2020

Isolation Skype Craft 4 - Journalling Dina style


Hello and welcome to our 4th Isolation Skype Craft adventure - where Brenda Brown, Alison Bomber and I craft together over Skype. This version was another - do as you please, rather than our original rules based projects. As always just lovely to craft in the virtual company of  crafting buddies.

What is good about this project is I have finished something. It seems recently that I keep starting projects and not finishing them. I blame all these Facebook workshops - I have done a couple and both are unfinished - despite them being great projects.

I did a Dina Wakley workshop last Saturday evening and my Skype craft was Sunday morning - so you can see what inspired this page!


I followed alot of the process I had done on the workshop but in my journal instead. I love Dina's free style, mistakes are ok, letting things happen. She has a great eye for colour and composition though so I am not fooled it is easy as she makes it sound!!!

Compositionally this went a bit wrong.... spotted it? I do not like where I have positioned the face on the RHS - the masked tag is sticking out of her head! HOW did I not see that - LOL.


The masking on the silhouette figures worked a bit better - I like these. You can see all the layers here. What I failed to maintain is much white space - something I am working on - but must have got distracted by the conversation!

As you would expect wonderful projects from Brenda and Alison that you can find here:


Nikki xx

Thursday, 7 May 2020

Isolation Skype Craft 3 - the mini version

ATCs with PaperArtsy Stamps by Lin Brown and Alison Bomber

Hi everyone and welcome to the third Skype Craft post of Isolation! Alison, Brenda and I met virtually for just an hour last Saturday. Well it was probably an hour of crafting, maybe a little longer chatting. This makes a change from our normal marathon sessions!!!

It was just an excuse to catch up really - we didn't have any rules - we just did what we wanted while chatting. Alison has put the idea of a trio of ATC's into my head so this is what  did.

ATCs with PaperArtsy Stamps by Lin Brown and Alison Bomber

My background was created with PaperArtsy Chalk paints and a couple of circle stencils. I brayered paint over the surface and then placed a stencil over to remove some - just gives a subtle effect. I then added a paler colour back through the stencil with a sponge and finally a darker colour by stamping with another circle stencil.

ATCs with PaperArtsy Stamps by Lin Brown and Alison Bomber

I stamped these wonderful leaves (PaperArtsy, Lin Brown) with versamark and heat embossed with  a vivid green powder.

ATCs with PaperArtsy Stamps by Lin Brown and Alison Bomber

A few words - PaperArtsy stamps by Alison of course!

----------------------------------

Check out Alison and Brenda's posts too! 


Until next time!
Nikki
xxx

Friday, 17 April 2020

'Out of limitations comes creativity' - Isolation Skype Craft 2

Hi everyone - how are you doing in these strange and difficult times. There are just a few things keeping me from going insane - exercise, craft and chocolate!

Saturday saw the second Isolation Skype Craft with Brenda Brown and Alison Bomber. Skype craft - crafting with friends over skype - is something we have done occasionally over the years but never twice in a few weeks! You can see Isolation Skype Craft 1 - here.

Usually we take it in turns to give an instruction to the others but this time we changed the rules and restricted ourself to limited supplies. We each got to choose 3 paints, 3 inks, a stencil, a stamp set, pre selected die cuts and an item recently purchased (bit of a wild card this one - as it could be a second stamp set / texture paste etc)

Here is my selection:

Now we all thought at first it seemed alot but then all panicked so allowed ourself an extra ink based product and paint:

There was still some good humoured stressing over limited supplies so I suggested we work with what we have and any point you could play your joker and use one more item (and the others could use it too)

So as the phrase goes -Out of Limitation Come Creativity - I made 2 tags using one of Gwen Lafleur's stamp designs from PaperArtsy.


Stamping the little fish in the backround with Chalk Fresco acrylic before smooshing some distress ink over.


Stamped with one of the circular stamp images in a mixture of ink and paint to make my patterned background here,


My JOKER was played - I needed my white posca pen!


I had 3 backgrounds made so die cut circles out of the tags to layer them up. Goldfish bowls maybe!
------------------------------------------

As always we all came up with very different designs, had a lot of laughs along the way and after 4 hours finally finished!

Here are Alison and Brenda's sneak peeks!


Happy crafting everyone - hopefully we can craft together again soon.
Nikki xxx

Monday, 30 March 2020

Isolation Skype Craft 1


Hello everyone

What difficult times we are living through. I feel lucky to have a hobby to turn to where I can sometimes forget any problem or worries.

On Friday I got together (virtually of course) with two crafting friends - Brenda Brown and Alison Bomber for one of our 'Skype Craft' days - it's been a while since we have done this. What a joy to spend several hours crafting, chatting and laughing with friends.

I worked on a large canvas, Brenda on a similar sized board and Alison in her large journal. 
As we have done in the past we take it turns to select the next step. I took photos at first then got carried away and stopped!!!

1. All - Seal the substrate with a coat of gesso/tinting base.

2. Alison - Use tissue paper and/or tissue tape.

3. Nikki - Use a stencil for some texture.

4. Brenda - Add some text/number stamping in any gaps

5. Alison - Add more than one colour paint in any way you'd like to,

Here you can see my strips of tissue paper, Grunge Paste through a brickwork stencil, some stamping and some washes of colour (Paper Artsy paint) added and then dabbed to remove with kitchen towel.

6. Nikki - Use something to create a resist. 


I really wanted use my new Izink Ice Translucent Gels from Seth Apter - so scraped some over the surface and dried. I also added some candle wax in places for additional resist.

7. Brenda - Use a colour medium to reveal your resist areas.

I added lots more paint layers at this point to create more contrast and depth and also allowed some paint to drip. 

8. Alison - Add some more stamping but not text and numbers.

I used a wonderful leaf stamp - from Lin Brown - PaperArtsy. 


9. Nikki - Select a focal point and gather elements together.

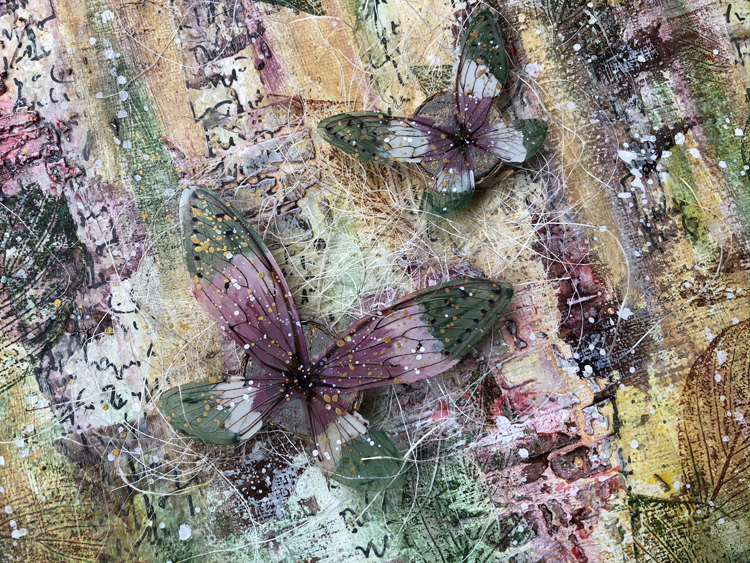
Textured Canvas with PaperArtsy Fresco Paint, Seth Apter Izink Ice, Tim Holtz Transparent wings

 10. Brenda - Alter/colour up/prepare and position elements for your focal point/s.

I painted the back of the Tim Holtz Ideology transparent wings in colours to match my canvas and splattered the front with white and gold paint. 

11. Alison - highlight or refresh the original background before adhering the embellishments.

I continued to build up my layers adding some dry brushed paint and using my pallet knife to add more Izink Ice. Oh and some splattered paint of course. The brown I originally scraped for resist, the red in the bricks and the transparent yellows on the canvas is the ICE.

Textured Canvas with PaperArtsy Fresco Paint, Seth Apter Izink Ice, Tim Holtz Transparent wings


I love some of the textures I managed to create - not sure about the overall composition but love the texture !!!!
When we do these sessions it is amazing how different everyone's turns out. Here are some sneak peaks for Alison and Brenda.


Sorry for this long post! We are hoping to Skype Craft again very soon - so look out for our next adventure!

Take care, stay safe, stay home (if you can) 
Nikki xxx


Friday, 7 December 2018

Christmas Greetings!

Hi! Today we welcome a new challenge at A Vintage Journey and a wonderful Christmas (or not!) theme of Star Light - Star Bright. Our host is the lovely Julia - here is her description:

This month we are asking you to to create with stars. Fill up the dark winter sky with them or use one really big one as your central focus. Stencil them, stamp them, emboss them or die cut them. Make a card, make a star box, make a canvas, create a journal page - remembering to create in the vintage, shabby, mixed media, art journaling, industrial or steam punk styles.

A couple of weeks ago Brenda (Bumblebees and Butterflies), Alison (Words and Pictures) and I had another of our Skype crafting sessions and we decided to to each create a project for this theme. For those that haven't seen our previous Skype Craft - we
all connect up via Skype and take it in turns to chose a step which we all need to follow. Sometimes we work on the same substrate but this time we each chose our own.

Brenda kindly recorded the steps - so I have added a quick summary of what I did to each of the steps.

1. A - Use paper to start the layers. - I covered my substrate with black and white patterned paper

2. B - Use the monoprint method to add any colour medium of your choice - I used watercolour card to transfer white paint randomly across the surface (it was too black!)

3. N - Add a wash or washes of a colour medium - I added blues!

4. A - Use a stencil any way you wish. - I used a star stencil, added versamark and added Baked Texture to the surface before heat embossing.

5. B - Use asemic or dynamic writing to add a layer of visual texture. - I took a silver metallic pen and scribbled! It is there if you look for it!! As it is silver it shows up when the light catches it.


6. N - Add a bit of texture. I added more Baked Texture around the edges of the plaque.

7.  A - Determine and prep the focal point of the design. I die cut my 'Christmas' several times and adhered together before using the same embossing powder again. Texture was added to the 'Happy' (a precut greyboard piece) before paints sponged.

8. B - Find elements to bring the composition together. - Stars - more stars!

9. N - On one or more of the elements use two different mediums of the same colour. I went for my blues and silvers on my die cut stars and 'Happy' - using embossing powder, foiling and glitter!

10. A - Add some words - Well I was ahead of the game now - already did that!

11. B - Add some sparkle - Ditto - so I cleared up the glitter I seemed to have got everywhere!

12. N - Assemble and add whatever you need to finish off your design. - I added Snowtex around the edges and on the words to enhance the winter feel.


It was a fun day!
If you havent already head over to AVJ for lots more Star Light, Star Bright Inspiration.
Nikki

Friday, 21 September 2018

Good things come in threes.....

Etcetera / GiganTAG with textured surface and Ornate Frame
Hello!
Last week I got 'together' with Alison Bomber from Words and Pictures and Brenda Brown from Bumblebees and Butterflies. Well it was a virtual meet up over Skype! You may recall Brenda and I did this last year to create our 'Skype Journals'. This time it was lovely that Alison joined us too, we had a great few hours crafting together with lots of laughter along the way.

We had decided we were going to work on a large mdf surface in advance but the rest of the session was decided as we went along - each of us selecting a step in the process. Brenda was very organised and documented our steps!! Some of these steps took alot longer than others. It was fun listening to each others thought processes without actually telling the others what we were doing - that had to wait for the BIG REVEAL at the end. 

B - Seal substrate with gesso
N - Use some texture paste any way you wish. 
A  - Dilute one colour of paint and apply in any way you choose. 
B  - Add crackle in anyway you want.
General - We gave ourselves time to start to gather embellishments and give time for the crackle to dry 
N - Add texture to one or more of the embellishments. 
A  - Add colour to one or more of your embellishments. 
B  - Create a panel to use in building layers. 
N - Apply a coat of paint to the background any way you like. 
A - Stamp ...... Alison said 'it's in your hands' but it must be pure stamping over the background. 
B - Dip, drip and dry watery washes. 
N - Edge the base in whatever way you want. 
A - Trial the composition and design and finalise the embellishments. 
B  - Do an Alison and add some words. 
N  - Add a touch of metallic. 
A  - Splatter.

Alison and I both worked on a large MDF tag - Tim Holtz Etcetera or That's Crafty - GiganTAG. This is a large surface - around 15 x 7.5 inches - a little scary when it comes to composition! I kept my embellishments smallish but then struggled with all the empty space - I don't do empty space very well. I confess I added the square / rectangles onto the mesh after we finished as it just seemed too empty!
Etcetera / GiganTAG with textured surface and Ornate Frame
The background had quite a few layers of texture, crackle, paint and stamping!
Etcetera / GiganTAG with textured surface and Ornate Frame
I think the Tim Holtz Ornate frame is my favourite part of this project. I layered a few up and gave a thick stippled coat of gesso before adding PaperArtsy Infusions and a bit of water. I blasted it dry and stippled some matt medium over it to help seal the Infusions before adding touches of gold paint.
Etcetera / GiganTAG with textured surface and Ornate Frame
Brenda's step of adding a panel resulted in me grabbing this old mesh I have and adding some paints!
Etcetera / GiganTAG with textured surface and Ornate Frame
Once we were all done it was time for the big reveal - so  if you havent already do head over to Alison and Brenda's blogs to see their amazing designs.
Thanks to both Brenda and Alison for a fun day! We are all a little short of crafting time these days so it was wonderful to take this time out.

I would like to join in the latest challenge at Frilly and Funkie - Creatures Great and Small and Anything Goes at Stamps and Stencils.

Nikki xxx