Showing posts with label Shabby Chic. Show all posts

Monday, 9 May 2016

Pink and sparkly!

Addicted to Art - Shabby Chic card
Hello - hope your weekend has been good, hottest day of the year (I think) in England yesterday although I didn't see much sun. I had a card class in the morning and we were also setting up our pop up craft shop again in Basingstoke town centre - the doors open tomorrow! (All Our Own Crafts).

I have been working on this card the last couple of days. It's been a while since I made something that wasn't for a DT piece or for the shop - this one was just for fun and inspired by a few challenges I saw popping up.

Yes it is pink, lot's of sparkly bits and, well, not quite my normal style! At Frilly and Funkie the goal is to do the opposite of your normal style - I think this fits the bill both in style and definitely in colour! Pink is being celebrated over at Stamps and Stencils and at Emerald Creek Dares it is all about B's - I have included buttons, butterflies and bling.  Simon Says Stamp are embossing - lots on here!  Finally two favourite blogs - We love to Create and Take it Make It (Crafter Stamper) - both mixed media anything goes this time.

I challenged myself to use this paper in my stash as my start point - but I had to tone it down - so it got a layer of watered down gesso, was embossed with clear texture paste and white distress embossing powder added (heated once the paste had dried).
My tags were hand cut and the card swooshed in a mixture of white and red paint (don't have any pink paint!) before some text was randomly stamped and finally I embossed with crackle texture paste through a stencil.
My wooden celebrate was coated with gesso and then microbeads added. Later I added some stickles too.
The cameo frame was made with air dry clay, painted with gesso, sealed with sparkly mod podge and later highlighted with stickles.
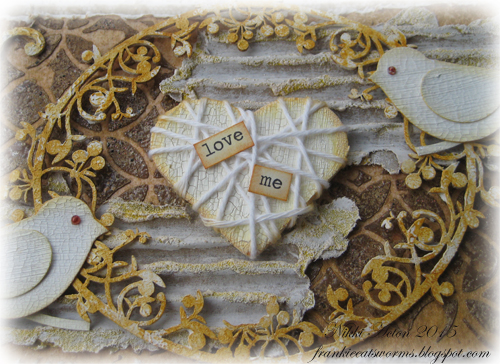
My doily is the new Tim Holtz die (love it!)
Some card was stamped with a script stamp and my butterflies punched, inked and have air dry clay buttons added (plus stickles!).
Addicted to Art - Tim Holtz Doily Thinlits Die
My little greeting was stamped and curled to make a little scroll banner.
Addicted to Art - Tim Holtz Doily Thinlits Die
I added a few beads, some fibres, lace and ribbon to decorate and some more stickles around the card although I doubt all the sparkle is showing too well on the photos!

Thanks for stopping by - I am back on Thursday with a project for Country View Crafts and I promise not to mention stickles quite so often next time!
Nikki
xxx
Addicted to Art - Shabby Chic card

Sunday, 21 June 2015

A little more shabby chic...

Addicted to Art - Shabby Chic

Just a little update .. to this scheduled post. I am not around much at the moment due to a family bereavement. I look forward to getting back to crafting and visiting your blogs in a couple of weeks hopefully. Nikki xxx
----------------------------

My second project this month for the Country View Crafts challenge blog. The theme this month is shabby chic - if you missed my first creation - the little wall panels - you can see it here.

Shabby chic is a little out of my comfort zone and this one was a struggle!
I started with some white card and added various texture pastes including some crackle paste. Once dry I added various paints and just moved them around with a baby wipe until I was happy. Once dry I dry brushed white gesso over the surface to catch the textured areas.  A little splattering of the gesso too.


The cameo frame was cut from some card I had painted in similar tones. I ran it through the big shot with an embossing folder and then added some darker paint to highlight.


My flowers were cut with Tim's tattered florals die out of pre painted card. Once the flowers were made I added a little distress crackle paint and once dry some more dry brushing.


My embellishments were then painted to complement the card and flowers and I added a chit chat sticker to complete it.

There are some fabulous shabby chic 'creators' out there and there is still plenty of time for you to join in at the Country View Crafts challenge if you haven't already.

Nikki
xxx

Monday, 1 June 2015

Cute little wall panels

Addicted to Art Shabby Chic Wall Hanging

Time for the start of a new challenge over at Country View Crafts and the theme is selected by the super talented Astrid, who I am sure most of you know.
For my first make I decided to do some little wall panels - they are just cheap MDF panels 6 x 3 inches.

I have used Paper Artsy fresco paints - including crackle glaze on both the panel base and the heart (die cut from greyboard and doubled up for strength.)


The little bottles were treated with mod podge and then Tim Holtz distress crackle paint. When dry I added alcohol inks to the bottles. I added some little flowers and glossy accents in the base of the little jars to look like water and to hold the flowers in place.

This was a bit a mistake! The green on the stalks leaked into the glossy accents turning my 'water' muddy green. So I added some alcohol ink to the glossy accents too. Still a big mistake - 3 days now and it still hasn't set - I wonder how long it is going to take! LOL.

 I thought this was going to be a simple little project but it turned out quite fiddly - but I do like the finished result (if it ever sets..). I think my favourite is the green one...


Thanks for looking
Nikki xx


Thursday, 12 February 2015

Frilly and Funkie Guest Design - Winter Blooms


It is a pleasure to be the Guest Designer today at Frilly and Funkie following winning one of their challenges recently ( for Winter Dreams). I am sharing this wall hanging I made. 


I started with a piece of hardboard measuring 20x10x0.5cm. I made sure I added a hanging devise to the back and covered front and back with gesso. I used paper artsy chalk paints (dry brushing) on the wood, some inking of the edges and added some background stamping in archival. I stamped a wonderful lace stamp (Stampin' Up) on some card and carefully ripped to fit my base and then distressed it and added some ink. I decided this needed to sit on a lighter piece of card so added another layer. I took some mesh and coated with gesso and then distress paint to give it a variegated colour. (For those in the UK, the mesh is from Poundland - I think it is supposed to be used in the oven!).


My flowers are made using Tim Holtz Tattered Florals die. I prepare my cardstock in advance by wetting and scrunching it up and leaving to dry. I then lightly ink over it – as the paper has been screwed up this highlights the lovely, subtle texture. Once complete I die cut various sizes and added a little more ink to the edges before creating my large flower and some smaller ones. Some of my leaves were created in a similar way using the Garden Greens die and the individual ones were pre made and just inked by me. I added some lace, some pearl string and seam binding.


Finally I stamped one of Tim Holtz ‘Simple Sayings’ and carefully curled the card for added dimension on the project.


Thanks for looking.
Nikki
xxx

Wednesday, 4 February 2015

Tweeting for Love


Hello everyone and a special welcome if you are new here!

I designed my creation today with Frilly and Funkie's ValenTwine theme in mind. I had created the textured and embossed background a few weeks ago and it was sitting on my desk so decided to put it to use. The background was created on kraft card using tinted texture paste through Tim Holtz lattice work stencil with some clear embossing powder added which was heated when the paste was dry. The card was then sprayed with tarnished brass distress spray.


I added some corrugated cardboard which has some decoart sand texture paste and gesso on it with a little wild honey distress ink to add colour.


Both my birds (Stampin' Up punch) and heart (found on my desk) were treated with Deco Art crackle paint and again a little wild honey added. My oval frame has gesso added for texture and colour added randomly.


You can't really see it but the base layer is kraft card with gesso splodged around and the edges distressed. The middle layer is vellum stamped with a fab new Stampin' Up stamp I have - called 'I love lace'. (Sorry no close up of this.)

Some white bakers twine was wrapped around the heart and some chit chat stickers added. 

I would also like to enter the following challenges:


Thanks for looking
Nikki
xxx


Saturday, 24 January 2015

Time to Love


Good morning (in the UK) and happy Saturday everyone. Today I would like to share a romantic little card with you - not sure why I have gone all feminine and floral of a sudden - but enjoyed making it all the same!

Quite a large card for me too - about 7'' x 7''.

Here we go - this is what I did:

  • The background was embossed card with a little heart stamped in scattered straw randomly and then tarnished brass distress stain over the top.
  • The pink hidden layer was embossed with a clocks folder and gesso added. Once dry a little aged mahogany DP added before sanding back.
  • The torn pieces were a patterned resist paper I stamped over with a creative expressions clocks stamp and then I wiped the surface to reveal the resist.
  • My clock is by Cheery Lynn - although I kept the centre intact. I covered with tarnished brass crackle paint and once dry added black soot distress stain and heated.
  • My flowers are the poinsettia creative expressions die. I prepared my card by wetting and scrunching and leaving to dry before die cutting. I then lightly inked with tarnished brass distress stain before creating my flower.I added a raffia bow and the centres of the flowers are balls of air dry clay coated in tarnished brass crackle paint.
  • The letters are also air dry clay - covered in aged mahogany DP and a little gold embossing powder added.
  • My hearts are tando pre cuts - with tarnished brass distress stain added.


I have made this for the following challenges:


Thanks for looking 
Nikki
xxx

Monday, 19 January 2015

Winter Dreams...


It is good to be back! I have been away for a couple of weeks and seem to have missed so much - both in blogland and at CHA. Had a wonderful time in South Africa but missed my crafting. 

big hello and thank you to my new followers - I really appreciate it. I have had some wonderful comments over the past couple of weeks too - thank you very much.  

So I have been working on a new style for me - a little more shabby chic. It is hard for me not to get out the browns and blacks but quite pleased with this. Like so many others I have been having problems with photography in the UK winter light so my photos look at little eratic. I think the photo at the top gives the truest colours - I used iced spruce and watered down evergreen bough to create my wintery, frosty card.

I started with a stencil and texture paste to create the backgrounds leaves. Lots of gesso, lots of layers, more gesso and random inking!


I would like to enter:

Thanks very much for visiting - back tomorrow with something a little cleaner!
Nikki
xxx


Wednesday, 14 January 2015

A shabby little card...


Good morning everyone.  I am sharing this project over at Country View Crafts today where there is a full step by step. Do pop over and take a peek!

I loved making this - a new style for me - a year ago I could never have imagined me making flowers ( bit of a tomboy really!). I was inspired by the fabulous Christmas card I received off Pamellia at My Little Craft Things.  This is the card I received - do visit her site if you haven't been there - her work is beyond stunning.


I would like to enter my card into the following challenges:
Craft Hoarders Anonymous - Choose your Challenge
(Paint, Lace, Die Cutting, Embossing, Flowers)
Artist Trading Post - Fresh Beginnings
(A new style for me!)
Mixed Media Card Challenge - New
( New style)
Inspiration Destination- Anything Goes


Thanks for stopping by
Nikki
xxx