Sunday, 21 June 2015

A little more shabby chic...

Addicted to Art - Shabby Chic

Just a little update .. to this scheduled post. I am not around much at the moment due to a family bereavement. I look forward to getting back to crafting and visiting your blogs in a couple of weeks hopefully. Nikki xxx
----------------------------

My second project this month for the Country View Crafts challenge blog. The theme this month is shabby chic - if you missed my first creation - the little wall panels - you can see it here.

Shabby chic is a little out of my comfort zone and this one was a struggle!
I started with some white card and added various texture pastes including some crackle paste. Once dry I added various paints and just moved them around with a baby wipe until I was happy. Once dry I dry brushed white gesso over the surface to catch the textured areas.  A little splattering of the gesso too.


The cameo frame was cut from some card I had painted in similar tones. I ran it through the big shot with an embossing folder and then added some darker paint to highlight.


My flowers were cut with Tim's tattered florals die out of pre painted card. Once the flowers were made I added a little distress crackle paint and once dry some more dry brushing.


My embellishments were then painted to complement the card and flowers and I added a chit chat sticker to complete it.

There are some fabulous shabby chic 'creators' out there and there is still plenty of time for you to join in at the Country View Crafts challenge if you haven't already.

Nikki
xxx

Friday, 12 June 2015

Recycled cat food box masculine wall hanging


Hi everyone. Just wanted to quickly share a little wall hanging I made with a more masculine theme to my shabby little hearts and flower panels. We are all blacks, whites, grey and platinum on this one but still with the crackled heart and faux cracked glass. 

I have used Tim Holtz Cameo frame - about 6 layers - cut from Frankie's cat food boxes to create the frame. Lots of texture and paint and some embossing powder on my cogs.

It is challenge 30 at Compendium of Curiosities - Faux Crackled Glass from Tim's wonderful book. This challenge is sponsored by the Funkie Junkie Boutique.

At Frilly and Funkie it is time for Monochromatic (right up my street!)

And at Pamellia's lovely new challenge - Anything but Cute - it is all about Masculine.

A few close ups:


Thanks for looking - have a wonderful Friday / weekend.
Nikki xx

Tuesday, 9 June 2015

Father's Day cards


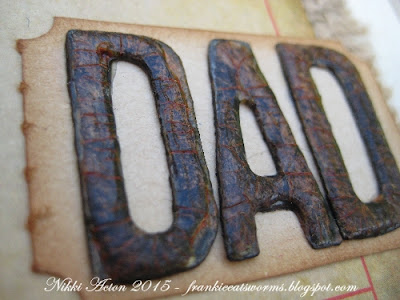
Hi everyone. Just a quick post today to share a couple of Father's Day cards using more of my glossy stars and some crackled lettering. If you missed the process for these you can find it on my post for my Father's Day tag - here.

I would like to enter the following challenges:


Thanks for visiting - see you soon.
Nikki
xxx


Friday, 5 June 2015

Eroded Metallic Butterfly Plaque


Life continues to be a little hectic round here but I came up with a plan! ( I am a bit slow sometimes). I am currently lucky enough to be involved in a pop up craft shop selling a few of my little creations and this has been keeping me busy along with the day job. I haven't entered a challenge for a while and am missing my blogging time. So this week when making a few more things for the shop I realised (yes... slow) that I could combine the two things!

So I made this little plaque incorporating Tim Holtz's Eroded Metallic technique ( P44 Compendium of Curiosities 3) which is the current challenge at Linda Ledbetter. This months challenge is sponsored by Inspiration Emporium

Both my butterfly and circular frame use the technique and I have mounted them on an a plaque painted to create a wood effect. I created the body of the butterfly by wrapping string around a stick and also framed the piece with string. In a moment of madness for me I added stickles around the edge too. I have varnished the entire piece for the shop which I probably wouldn't have otherwise done.


I would also like to enter:
That's Crafty - All that Glitters

Thanks for peeking today and for the lovely comments this week. I am planning a good visit around blogs later today or Sunday. Have a lovely weekend.
Nikki
xxx

Celebrating with the Runway Girls and a trio of embossing

Tim Holtz Runway stamps

The first Friday of the month means a new challenge over at A Vintage Journey and the theme for June is Celebrations. 
My Runway girls were stamped with Sepia archival before watercolouring a little colour, fussy cutting and edging with vintage photo.

Do you ever get asked how to emboss? I always find it a difficult question to answer as we are spoilt with so many techniques. I have used three on this card....
For my base layer I used embossing paste through Tim's flourish stencil and once dry added vintage photo DI.
The middle panel was dry embossed on card treated with gesso and then various brown tones of distress paint. Once dry I took it though the big shot in the embossing folder and then sanded back to reveal the raised surface.
My clock was inked and then vintage photo embossing powder added.


I finished with my sentiment - from the ever versatile simple sayings collections. On a scrap of previously spritzed card I stamped my saying and added a little more vintage photo DI.

Hope you have a reason to celebrate this month!
Nikki
xxx

Tuesday, 2 June 2015

Altered Coffee Tins..


Hello everyone - I am sharing this altered coffee tin project over the the Country View Crafts Project blog today.
Nikki
xxx

Monday, 1 June 2015

Cute little wall panels

Addicted to Art Shabby Chic Wall Hanging

Time for the start of a new challenge over at Country View Crafts and the theme is selected by the super talented Astrid, who I am sure most of you know.
For my first make I decided to do some little wall panels - they are just cheap MDF panels 6 x 3 inches.

I have used Paper Artsy fresco paints - including crackle glaze on both the panel base and the heart (die cut from greyboard and doubled up for strength.)


The little bottles were treated with mod podge and then Tim Holtz distress crackle paint. When dry I added alcohol inks to the bottles. I added some little flowers and glossy accents in the base of the little jars to look like water and to hold the flowers in place.

This was a bit a mistake! The green on the stalks leaked into the glossy accents turning my 'water' muddy green. So I added some alcohol ink to the glossy accents too. Still a big mistake - 3 days now and it still hasn't set - I wonder how long it is going to take! LOL.

 I thought this was going to be a simple little project but it turned out quite fiddly - but I do like the finished result (if it ever sets..). I think my favourite is the green one...


Thanks for looking
Nikki xx