Monday, 2 May 2016

Loving crackle!

Hello everyone - hope you have had a lovely weekend and if in the UK are enjoying our holiday weekend. Today I am over at A Vintage Journey with a step by step on this reverse canvas for our Destination Inspiration series.
There is lots of lovely crackle to be found so be great to see you there.
Nikki 
xxx

Sunday, 1 May 2016

Stencils and Wildflowers

Addicted to Art - Tim Holtz Wildflower and Layering Stencil
 Hi everyone and thank you for stopping by today. The start of the month marks a new challenge at Country View Crafts with our theme being to Use a Stencil. 

But this is no normal month we also have a blog hop and an amazing prize up for grabs - you could win a
Sizzix Big Shot Machine & Die Bundle
To enter, you must be a follower of the Country View Crafts Challenge Blog and also hop along to each of the Design Team Members blogs and leave a comment. 
The normal monthly challenge is still taking place and those who link their Use A Stencil projects will also be entered into the £20 Voucher draw. Winners will be picked at random in early June. 

So here are some links for you:
If you are here from Doreen's blog (hello!) the next on your list is Monika.

After all that excitement here are some more details of my project!
I decided to make a few cards with different backgrounds all using a slightly different technique but all using distress inks and Tim Holtz layering stencils.
Addicted to Art - Tim Holtz Wildflower and Layering Stencil
From left to right:
1. I added various inks to my card using cut and dry foam. I then placed the stencil (my favourite - latticework) on top and spritzed with water - gave it a few seconds to react and then laid kitchen roll over to remove the ink.
2. I used the splotches stencil. I secured it over the card and used cut and dry foam to add a blue toned ink randomly but not over all of it. I then took a green ink and added to the remaining white areas.
3. Latticework again secured to my card. With a stencil brush I created a rainbow effect by brushing my inks in lines down the card.
4. Not as successful I think! The honeycomb stencil with 2 tones of pinky / purple - again with a stencil brush - the aim being to create a slight shadow.

I cut wildflowers from the die set out of dark blue cardstock and matted my backgrounds onto the matching card.
Addicted to Art - Tim Holtz Wildflower and Layering Stencil
Nikki
xxx

Friday, 22 April 2016

Calico Craft Parts - Design Team Application

A little review post as my submission for the DT call at Calico Craft Parts. I am sharing three past projects so please do not feel the need to comment unless you want to!

My style is varied with a focus on mixed media - using a variety of substrates (e.g. canvas, wood, paper) to create wall pieces, cards, tags or altered objects. 

Project 1. 
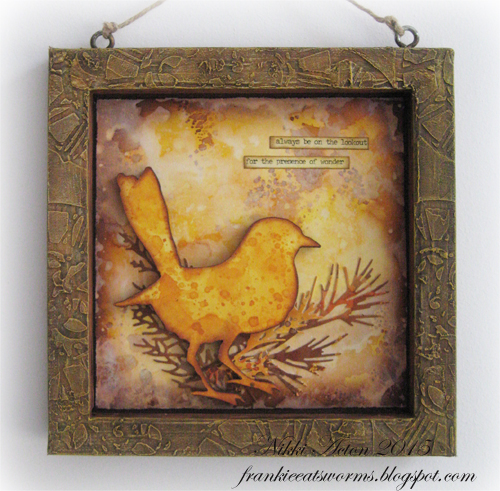
Reversed canvas. Textured frame, ink and paint background, die cut silhouette bird (foam board).
Original post 

Project 2.
Layered tag, home made flower, embossed and inked backgrounds.
Original post
Project 3.
Altered and layered canvas.
Original post

Nikki xx


Wednesday, 20 April 2016

Anniversary Cards

Just a quick post today - I am over on the Country View Crafts project blog sharing a step my step for this Anniversary card.
Tim Holtz Scribbles and Splats Anniversary Card
Nikki
x

Sunday, 17 April 2016

Guest Design - Mixed Media World - Get in Gear

Hi everyone - today I am guest designer over at Mixed Media World. Their theme this month is Get in Gear so I decided to make a masculine birthday card. 

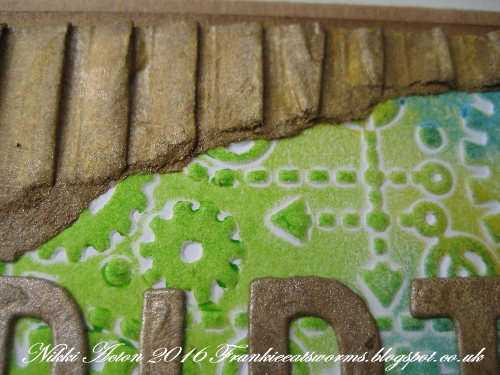
My base is embossed card stock with distress crayons - just added in various places and smudged with my fingers.
I took some corrugated card and dry brushed gesso over it. I tore it to create a little frame before adding some tarnished brass distress spray. The letters were die cut and coloured in a similar way.
I added a die cut cog that was on my desk and metal embellishment for the 'O'. I mounted it on a kraft base and card.

I would like to enter - Frilly and Funkie - Boy oh Boy

See you next time!
Nikki
xx

Tuesday, 12 April 2016

Sparkly Flower Canvas

Hi everyone - something a little different today - lots of paint, stencilling and drawing to create this fun canvas. Details on what I did can be found over at Country View Crafts. Be good to see you there.
Nikki
x

Tuesday, 5 April 2016

Wonderful World Canvas

Hi everyone. Today I am very happy to be a guest designer over at Anything But Cute. I am sure you all know this blog, created by the amazing talent that is Pamellia! 
Their current challenge is celebrating Earth Day - what a great theme - chosen by Samra. Here is how she describes it...
Create a mixed media project inspired by the beauty of our planet and tell us what inspired you. It could be echo friendly, or even recycled item, or depiction of sea, mountain, river, forest...let's celebrate our planet!

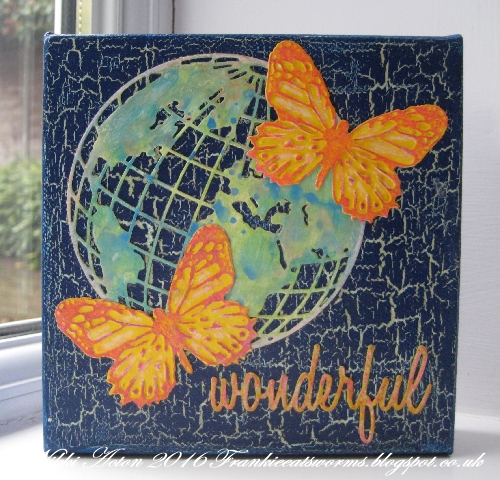
I decided on a canvas using Tim Holtz's globe die. 
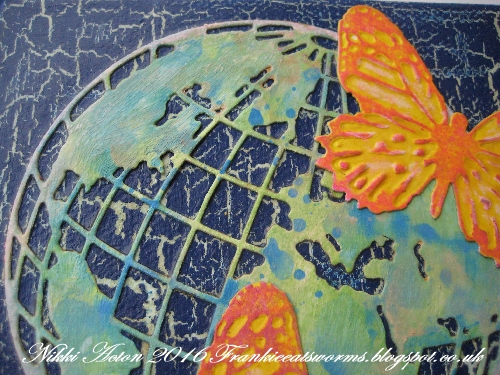
I smooched the die cut in distress inks until I was happy with the result. I painted my canvas with sage PaperArtsy paint and once dry coated with crackle medium. (Just a thin layer - using a credit card). Again when dry I added my dark blue paint - this is actually just household paint but works perfectly for this technique.
I die cut and embossed two butterflies (Butterfly Duo). I then took an oil pastel and covered the embossed area. The oil will then resist anything water based. This is great for then adding distress inks or stains but I actually went with paint in the end. As the pastels do not resist this as well I added another layer once the paint had dried. My word used the same paint (PaperArtsy Banana) and I added touches of the same oil pastel.
I hope you like my canvas celebrating Earth Day.
Thanks for stopping by.
Nikki
x